by Sabine B.

by Sabine B.
by Meru S.
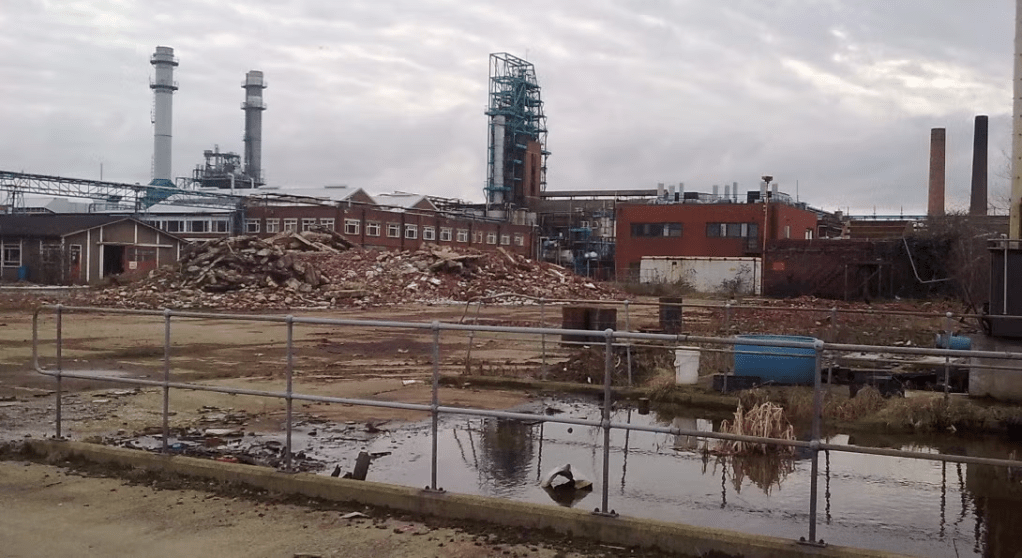
A property can be considered a brownfield and not just an abandoned building when the local city detects contaminants underground beneath the property. Additionally, it can be regarded as a brownfield even if there is only a possibility of pollutants, since in both circumstances, it would be unsafe for prolonged human activity or residence. Brownfields are generally previously occupied plots that are no longer in use.
Sites that may possibly become brownfields in the future include gas stations, industrial buildings, and older houses. Leakages in subterranean gas pipes can toxify the land around gas pumps. Similarly, chemicals can seep into the area around factories, resulting in spaces that are hazardous to residences. Homes that were built before 1978 are more likely to contain lead, particularly in the paint. Therefore, when these houses dilapidate over time and layers of paint peel and decay, it releases lead into the surrounding yards. We can prevent brownfields by repairing gas and chemical leaks, and safely renovating old homes.
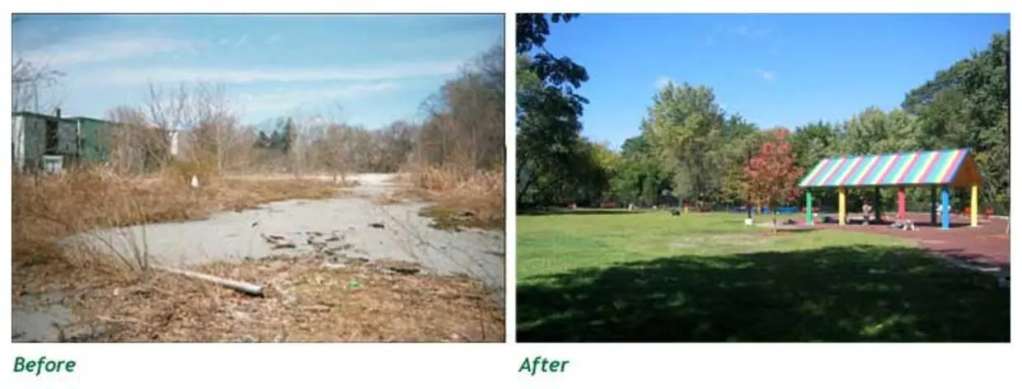
Once remedied, brownfields can be redeveloped, providing environmental, aesthetic, and security benefits. After toxins are identified and eliminated, the site can be transformed into parks, shops, and other functioning premises. The decontamination contributes to the health of the environment. When new buildings are constructed, preexisting structures and roads can be incorporated into the new development, inhibiting sprawl. This process of including prior derelicts is called infill-development. Finally, brownfields are often neglected and unattractive, instigating higher crime rates in the local neighborhood and dissuading people from moving to the area, so restoring these plots restores the city’s status as well.
by Camden S.
One thing that everyone needs when making a 3D printed model is 3D modeling software. No matter if you are new to the hobby, or have some experience, a program for creating objects is a crucial tool. This article is about software specifically for 3D printing, yet can be used in a variety of applications, and this will be discussed in a bit more detail later on. But, what 3D modeling software should you use?
Tinkercad:
Tinkercad is one the easiest modeling software to learn due to its simple nature. It’s web-based, with a low learning curve, making it perfect for beginners. In Tinkercad, you use shapes to create complicated objects piece by piece by grouping them together, then cutting a hole out from the overlapping parts, like a cookie cutter. Tinkercad is primarily oriented towards younger users, but anyone can use it, especially when starting out.
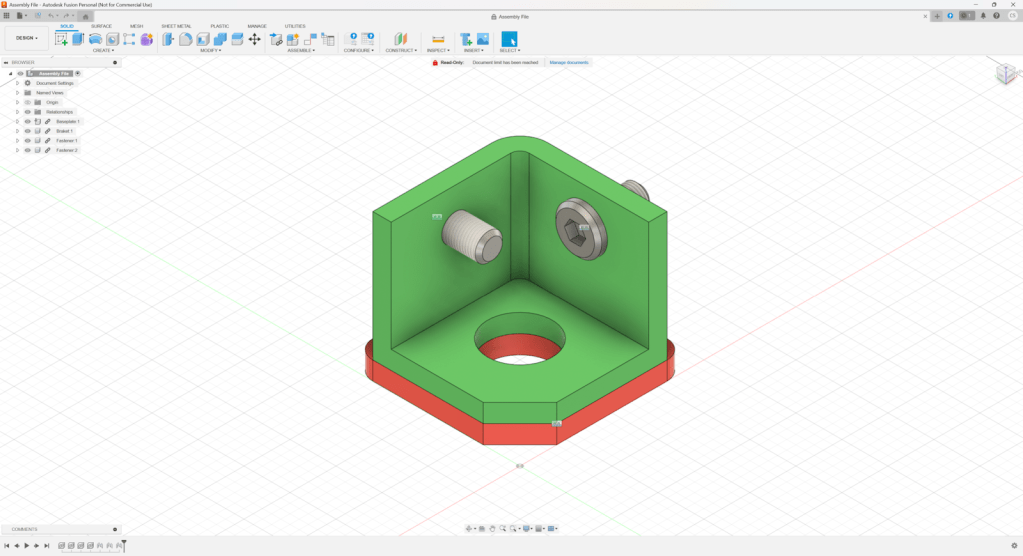
Fusion:
Fusion can be seen as an older sibling to Tinkercad and is free for hobby use. It uses dimensions, which define how big each part of your object will end up, and how it’s positioned in relation to other parts. This allows for easy modification of the project later on, and to have a history of past edits that you can get back to for editing. Fusion is used by hobbyists, as well as professionals in 3D printing, and the manufacturing of many products. This software has a higher learning curve than Tinkercad; however, it’s worth the work for people who want a more powerful program.
Blender:
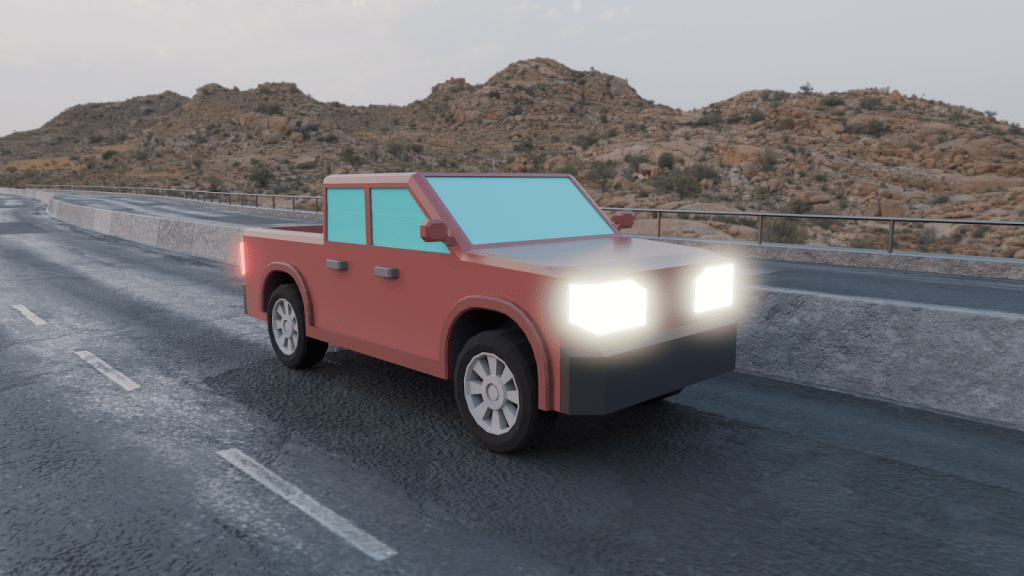
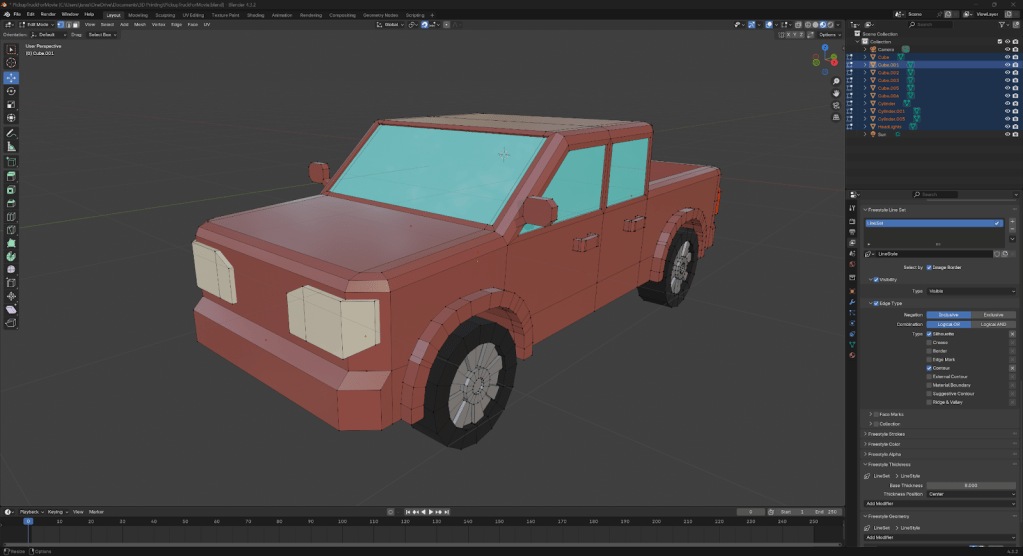
Blender is open source, and free to use for everyone. It uses individual points in space called vertices, with lines connecting those vertices, called edges, which you can connect to create faces. Blender is the most versatile software described in this article, and can be used for anything from modeling to animation, and even making full movies. It is able to create objects that wouldn’t be possible in the other two. For example, realistic plants and animals, or basically any organic shapes can be designed with this software. But with that comes a caveat: Blender has a very high learning curve, so the ability to use it to its full potential may take a lot of time and effort. It’s a very powerful tool, but with great power comes great responsibility.
Here are a few examples as to how each of these fundamentally work. (These are not full tutorials, so every detail won’t be included, but it should give you a good idea of how the software works.) So, let’s say you want to make a cube with a square hole on the top:
In Tinkercad you would create two cubes one bigger than the other. Take the small cube and put it on the top of the big cube half of it inside. Then select the type of the small cube as “Hole”. Lastly, group both together, this will cut the part of the small cube into the big cube.
In Fusion, start by creating a sketch on the floor plane, then create a 2-point rectangle on the sketch putting in how big each side will be. Then, finish the sketch and extrude it up and write in how tall you want it to be. Then create a sketch of the top of the cube and extrude it down and tell it how deep you want to hole.
In Blender, begin with adding a cube. Next enter edit mode and select the top face and inset it. Then extrude down.
Each software is unique and offers different tools, so I recommend trying each one to see what best suits your preferences. Happy printing!
by Sabine B.
by Sabine B.
by Sabine B.

by guest author Jonathan David
Don Petit, the current oldest active astronaut, returned to Earth on his 70th birthday from
a 220-day mission on the International Space Station. He spent many hours on scientific
research in the areas of 3D printing in space, water sanitation, plant growth and fire behavior in
microgravity. This was his fourth mission, totaling 590 days of space time. His main job on the
team is flight engineer.
In an April 28th interview at Johnson Space Center he concluded by sharing, “ I could
look out the window and just enjoy the view. But, when I’m looking out the window just enjoying,
its like, ‘Oh, Wow. A meteor. Oh, wow, look at that. Man, there’s a flasher. What’s that? And, oh,
look at that. A volcano going off? It’s like, okay, where’s my camera? I got to record that. And
part of this drive for me is when your mission is over, it’s photographs and memories.’”
Thank you for reading this article. Stay tuned for more NASA news! Special thanks to
ABC News for interview information.
by Sabine B.
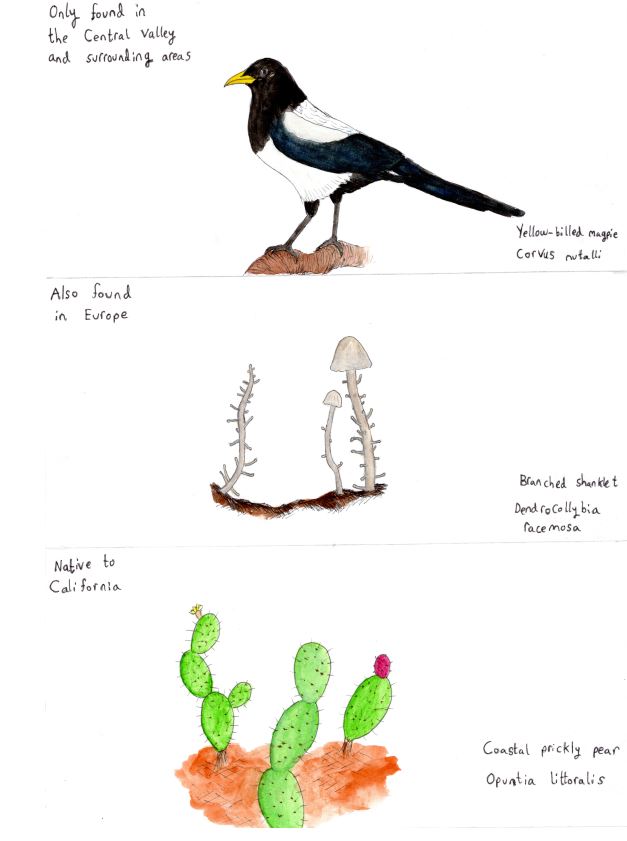
Why is California so diverse? One reason is the abundance of different biomes and environments. The wide beaches and rocky cliffs of the coast regions border groves of redwood trees, oak woodlands merge into stands of fir and pine that give way to alpine meadows, and sage flats sprawl into sandy deserts. We have both the highest place in the continental US, Mount Whitney, and the lowest place, Badwater Basin. There are many different habitats in California which means there are a lot of different species.
There is another reason as well! The land along the coast of California is part of a biome known as the chaparral biome, and those oak woodlands I mentioned are part of it. This biome is one of the rarest biomes on earth and it provides the perfect environment for lots of unique species. It only exists on the western side of continents and only from 40 degrees to 30 degrees north and south on either side of the equator. It is found along the coasts of Chile in South America, along the coast of Australia, along part of the coast of Africa, along the coast of California, and, in probably its most famous occurrence, in the Mediterranean in Europe (the chaparral biome is the reason for that ideal ‘Mediterranean climate’). The chaparral has mild wet winters and long hot summers. Its rain cycle is one of the things that sets it apart from other biomes.
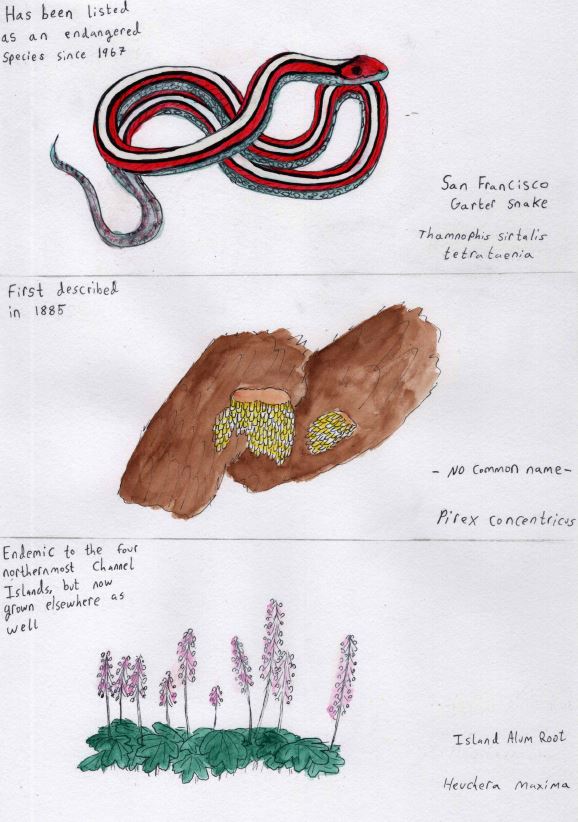
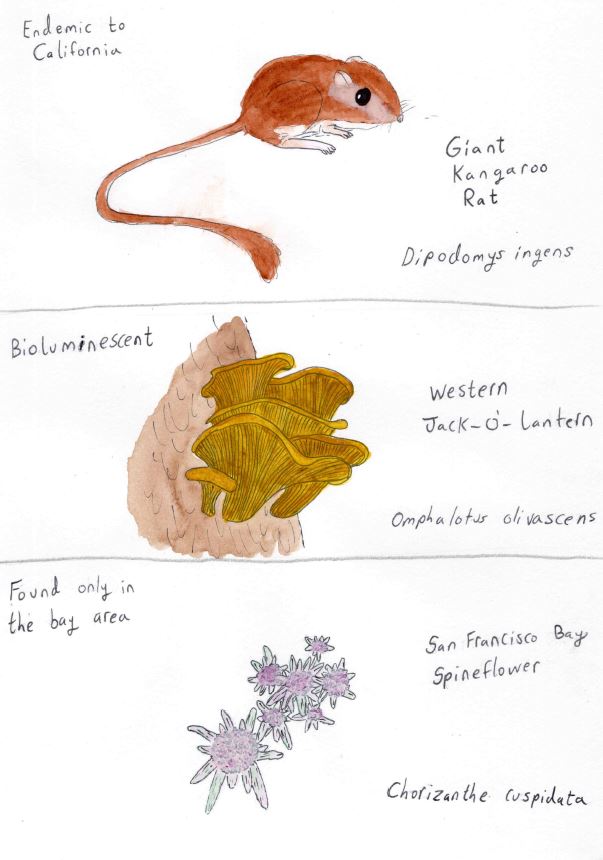
Due to its weather patterns, the plants of the chaparral have evolved adaptations that prevent drying out during droughts, and are fire resistant to protect against fires. The animals have adapted along with the plants. Because the chaparral zones are so far apart, and have such favorable conditions, and are so rare, species that settle in them often specialize to fit them. This means that chaparral zones are biodiversity hotspots. Those are places where more of the species living there are biologically unique than in other places. Just like in other biodiversity hotspots, California has many, many endemic species. They are found nowhere else in the world. Some of the species I will be sharing with you are found in only one or two counties in California.
Every installment is researched and illustrated by me and will feature a native Californian animal, fungus, and plant. I will include the scientific name and the common name if there is one. I will also note something special about them. Feel free to look them up for more about them!
by Camden S.
How does one start 3D printing? In this article you’ll learn the basics of 3D printing, and where to start.
Picking the Printer
There are three main types of 3D printers: FDM (Fused Deposition Modeling) uses a spool of filament and prints molten plastic in layers, SLA (Stereolithography) uses a laser to cure resin for each layer, and SLS (Selective Laser Sintering) uses a laser to fuse powder together to create layers. We are talking about FDM printers as they are the most common desktop 3D printers and are the easiest to use. This is about FDM printers specifically, so information may differ if you are using another type of printer.
Types of 3D Filament
3D filament ranges in color, materials and uses. Some common materials are PLA, PETG and TPU.
PLA has a lower melting point and is easier to work with compared to other materials but is not ideal for outdoor conditions.
PETG is better suited for outdoors and has a higher melting point. It is also more suitable for bigger objects and mechanical parts but can be a little bit harder to work with.
TPU is a flexible material allowing you to make parts that need to deform but is a difficult filament to work with.
3D Models
The 3D printing process starts with a model. You can either make the model yourself or find one online on sites like printables.com or thingiverse.com. If you want to make a model yourself, there are multiple great programs to do it in.
Tinkercad is free and is used for 3D modeling electronics and coding well-being beginner friendly.
Blender is a free open-source program that has a wide range of uses from 3D modeling, video editing to even making movies though it has a steep learning curve.
Slicers
A slicer is a program that converts a 3D model into something a 3D printer can read called G-code. Slicers also allow you to adjust every aspect of your print from size to print speed, infill and supports. One great slicer is Prusa slicer which is free and open-source.
Infill is a trick that is added in the slicer and is used to save filament and reduce print time by making an object hollow and filling the inside with a support structure. There are many types of infill ranging in look and density depending on what is needed.
A 3D printer cannot print in midair so when an object has parts that cannot be printed because there’s nothing to print on, that’s where supports come in. Supports are plastic scaffolding added in the slicer designed to be removed after the print finishes. Supports are an essential part of 3D printing though if they are not necessary it’s better to not have them.
The Finished Product
Finally, you get to print the object. This is usually the final step as post processing is not common when using FDM printers. 3D printed objects usually are strong and can be used for a wide variety of uses. Examples of uses range from miniatures to parts for mechanical objects, but the sky is the limit when it comes to 3D printing.
by Layal Hilal
Have you ever seen a waterfall on fire? If you have, you’ve probably been to Yosemite and seen Horsetail Falls in February, where the waterfall “lights on fire” a few times every year. The illusion of it becoming a literal “river of lava” is caused by the sun setting at the right time in the right place, and it has attracted hundreds of visitors across the country, including me and my family!
Facts about Yosemite’s Horsetail Waterfall Firefall:


Go to Horsetail Falls. Watch it turn orange. Take a million videos. Revisit the memory in your dreams. Wish it lasted longer. If you can’t go this year, go next year. Even if you watch it from your car, parked illegally on the side of the road because you came too late, starving because you forgot all your food, with trees and clouds partially blocking your view and your camera forgotten at home, you won’t regret it. And if you do…keep going until you don’t.
